Beginner’s Guide to Astrophotography
Welcome to the captivating world of astrophotography, a unique blend of science and art where the vastness of the cosmos is captured through the lens of a camera. This intriguing hobby offers an opportunity to explore the night sky in a way that transcends the limits of the naked eye, revealing celestial wonders in stunning detail.

Astrophotography is more than just taking pictures of stars. It’s about capturing the awe-inspiring beauty of the universe. From the ethereal glow of distant galaxies to the intricate patterns of star clusters and the mesmerizing swirls of nebulae. It’s about the thrill of chasing the perfect shot. Whether it’s a meteor shower streaking across the sky or the rare transit of a planet across the face of the sun.
But why is astrophotography such an interesting hobby? For one, it offers a unique perspective on our place in the universe. Reminding us of the vastness of space and the beauty that lies beyond our planet. It’s also a hobby that constantly challenges and rewards, requiring patience, skill, and a touch of creativity. Whether you’re a seasoned photographer looking to expand your horizons or a stargazer wanting to capture the wonders of the night sky, astrophotography offers a rewarding and endlessly fascinating journey.
Join us as we delve into the basics of astrophotography. Guiding you through the equipment, techniques, and tips you’ll need to start your own cosmic adventure. Let’s embark on this stellar journey together!
Understanding Astrophotography: A Glimpse into the Cosmic Canvas
Astrophotography, at its core, is the art and science of photographing celestial bodies and astronomical events. It’s a specialized branch of photography that requires a blend of technical skills, patience, and a deep appreciation for the night sky. But what makes astrophotography truly fascinating is the diversity of its subjects and the different techniques used to capture them.
There are several types of astrophotography, each offering a unique perspective on the cosmos:
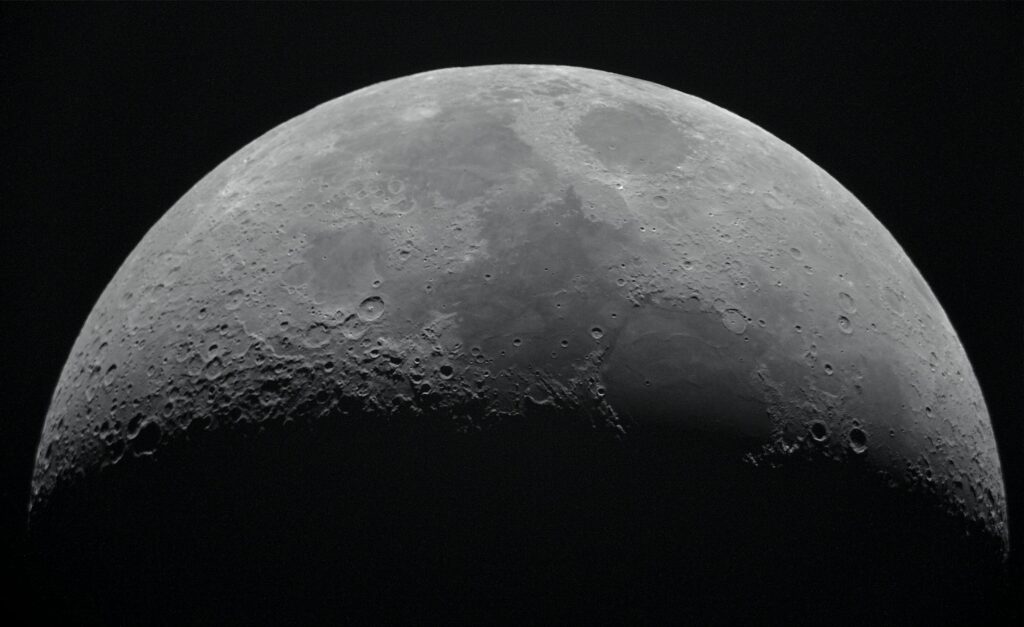
- Lunar Astrophotography: This focuses on capturing the moon in all its phases and details. From the crescent moon hanging delicately in the twilight sky to the full moon illuminating the night. Lunar photography offers endless opportunities for stunning shots.
- Planetary Astrophotography: This involves photographing the planets in our solar system. With the right equipment and conditions, you can capture details like the rings of Saturn, the bands of Jupiter, or the red hue of Mars.
- Solar Astrophotography: This is the practice of photographing the sun. Specialized equipment is required to safely capture images of solar flares, sunspots, and solar eclipses.
- Wide-Field Astrophotography: This type of astrophotography captures large areas of the night sky, often including landscapes for context. It’s commonly used to photograph constellations, the Milky Way, and meteor showers.
- Deep-Sky Astrophotography: This is perhaps the most challenging type of astrophotography. It involves capturing distant celestial objects like galaxies, nebulae, and star clusters. This requires advanced equipment and techniques, including long exposure times and image stacking.
Each type of astrophotography offers its own set of challenges and rewards. Making this hobby a continuous journey of learning and discovery. Whether you’re capturing the moon’s craters or the spiral arms of a distant galaxy, astrophotography allows you to explore the universe from your own backyard.
Getting Started: Your First Steps into Astrophotography
Embarking on your astrophotography journey requires some essential equipment. An understanding of the importance of location and timing, and an awareness of the impact of light pollution. Let’s delve into these key aspects:
- Basic Equipment for Astrophotography. The basic gear for astrophotography includes a camera (a DSLR or mirrorless camera is often preferred). A sturdy tripod, and a fast lens, ideally with a large aperture. For more advanced astrophotography, you might consider a telescope, a motorized mount for tracking celestial objects. And specialized astrophotography software for image processing.
- Importance of Location and Timing: The location and timing of your astrophotography sessions can significantly impact the quality of your images. Dark skies away from city lights offer the best conditions for capturing the stars. The time of year and the phase of the moon also play a role. As they determine which celestial objects are visible. There are various apps and websites available to help plan your astrophotography sessions based on these factors.
- Understanding the Impact of Light Pollution: Light pollution, caused by artificial lighting in populated areas, can greatly hinder your ability to capture clear images of the night sky. It washes out the faint light of stars and galaxies, making them difficult to photograph. For this reason, astrophotographers often seek out dark-sky locations away from city lights. Using filters that block out certain wavelengths of light can also help mitigate the effects of light pollution.
By understanding these fundamental aspects, you’ll be well-prepared to start your astrophotography journey. Remember, astrophotography is a hobby that requires patience and practice, but the rewards of capturing your own stunning images of the cosmos are well worth the effort.
Camera Settings and Techniques: Mastering the Art of Astrophotography
Understanding your camera’s settings and mastering various techniques are crucial steps in your astrophotography journey. Let’s explore these elements in detail:
- Key Camera Settings: The three pillars of photography – ISO, shutter speed, and aperture:
- ISO determines your camera’s sensitivity to light. A higher ISO increases the brightness of your image but can also introduce noise.
- Shutter Speed is the length of time your camera’s shutter is open. Longer shutter speeds allow more light to reach the sensor, capturing faint stars and galaxies. However, due to the Earth’s rotation, excessively long exposures can result in star trails.
- Aperture refers to the size of the opening in your lens. A wider aperture (represented by a lower f-number) lets in more light, which is beneficial for astrophotography.
- The 500 Rule: To avoid star trails in your images due to the Earth’s rotation, many astrophotographers follow the “500 Rule”. This rule suggests that your shutter speed should be approximately 500 divided by your lens’ focal length. For example, if you’re using a 50mm lens, your shutter speed should be no more than 10 seconds.
- Astrophotography Techniques: There are several techniques that astrophotographers use to capture stunning images of the night sky.
- Long Exposures: This technique involves using a slow shutter speed to capture more light.
- Light Painting. This technique can be used to illuminate foreground objects in night sky landscapes, adding depth and interest to the image.
- Time-Lapse Photography: This involves taking a series of images over a period of time and combining them into a video that shows the motion of the stars across the sky.
- Star Trail Photography: This technique involves using very long exposures or stacking multiple images to show the apparent motion of the stars in the sky, creating beautiful arcs and circles.

Choosing the Right Equipment: Your Toolkit for Astrophotography
The equipment you choose can make a significant difference in your astrophotography journey. From the camera and lenses to tripods, mounts, and telescopes, each piece of gear plays a crucial role in capturing stunning images of the night sky. Let’s explore these in detail:
- Choosing a Camera and Lenses. The choice of camera and lenses largely depends on your budget and the type of astrophotography you’re interested in. A DSLR or mirrorless camera with manual controls is often a good choice for beginners. As for lenses, a wide-angle lens is great for capturing large areas of the sky, while a telephoto lens allows for close-ups of specific celestial objects. Look for lenses with a wide aperture (low f-number) to capture as much light as possible.
- The Role of Tripods and Mounts: A sturdy tripod is essential in astrophotography to keep your camera stable during long exposures. For more advanced astrophotography, a motorized mount can track the motion of the stars, allowing for longer exposures without star trails.
- The Use of Telescopes: For close-up images of the moon, planets, or deep-sky objects, a telescope can be a valuable addition to your astrophotography equipment. When choosing a telescope for astrophotography, consider factors like aperture size (the larger, the better for gathering light), focal length (which affects the magnification), and the type of mount.
Remember, while having high-quality equipment can enhance your astrophotography, it’s not a substitute for understanding the basics and honing your skills. Even with modest gear, you can capture amazing images of the night sky with practice, patience, and a passion for exploring the cosmos.
Taking Your First Astrophotography Shots: Your First Glimpse of the Cosmos
Embarking on your first astrophotography session can be both exciting and a bit daunting. But don’t worry, we’re here to guide you through the process. Here’s a step-by-step guide to setting up and taking your first shots, along with some tips for photographing different celestial objects:
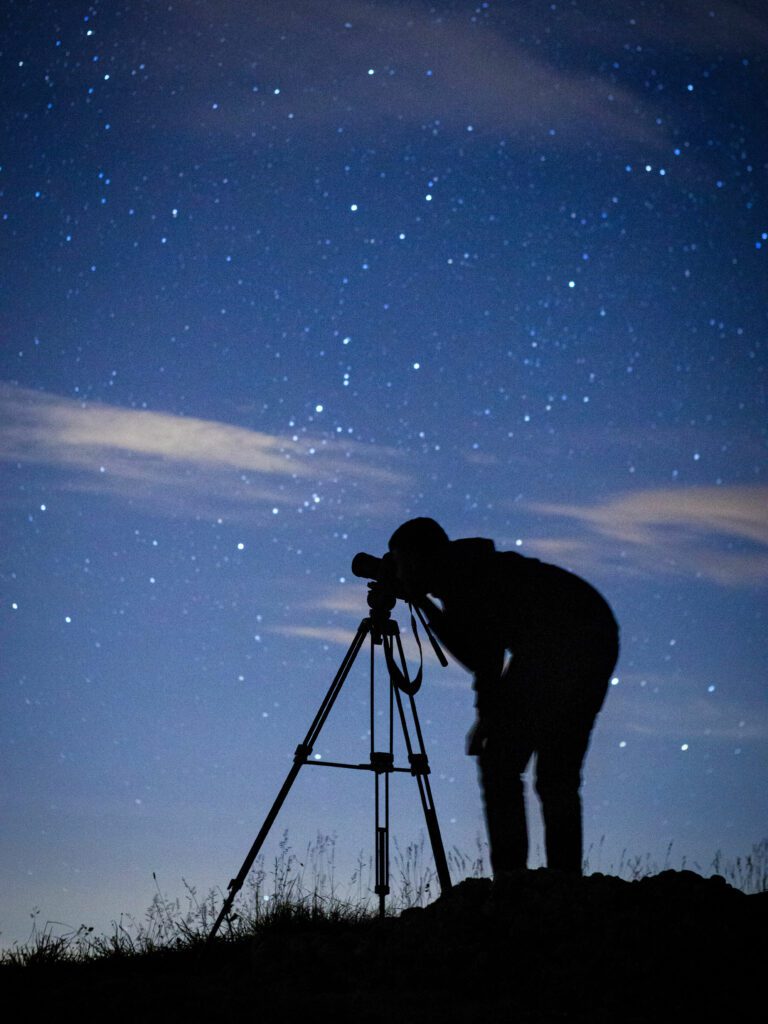
- Setting Up: Start by setting up your tripod and attaching your camera. Choose your lens or telescope based on what you want to photograph – a wide-angle lens for large areas of the sky or a telescope for close-ups of specific objects.
- Camera Settings: Set your camera to manual mode. Adjust the ISO, shutter speed, and aperture based on the conditions and what you’re photographing. A good starting point might be an ISO of 800, a shutter speed of 20 seconds, and the widest aperture your lens allows.
- Focus: Achieving sharp focus is crucial in astrophotography. Set your lens to manual focus and adjust until the stars appear as sharp points of light. Some cameras offer a ‘live view’ mode that can help with this.
- Composition: Frame your shot. If you’re photographing the landscape along with the sky, try to find a balance between the two.
- Taking the Shot: Use a remote shutter release or your camera’s self-timer to avoid camera shake when taking the shot. If your camera has a ‘Bulb’ mode, this can be used for longer exposures.
- Photographing Different Celestial Objects: Different objects require different approaches. For the moon, you’ll need a fast shutter speed to capture its bright surface. For stars and galaxies, longer exposures are needed to capture their faint light. Planets require a telescope to capture their details.
Post-Processing Your Images: Bringing the Cosmos to Life
Once you’ve captured your astrophotography images, the journey isn’t over. Post-processing, or editing your images, is a crucial step in astrophotography. It’s in this stage that you can truly bring your images to life, enhancing details and colors that may not be visible in the raw photos. Let’s explore the software and techniques involved in this process:
- Introduction to Editing Software: There are several software options available for editing astrophotography images. Adobe Photoshop and Lightroom are two popular choices, offering a wide range of tools for enhancing your images. There are also specialized astrophotography programs like DeepSkyStacker, which can stack multiple images to increase detail and reduce noise.
- Basic Editing Techniques: Here are some basic techniques you can use to enhance your astrophotography images:
- Adjusting Levels and Curves: This can help to enhance the contrast in your image, making the stars stand out against the background of space.
- Reducing Noise: High ISO settings, which are often used in astrophotography, can result in noise in your images. Most editing software includes tools for reducing this noise.
- Enhancing Colors: The colors of stars and galaxies can be enhanced in editing. Be careful not to overdo it, though – the goal is to bring out the natural colors, not create an artificial-looking image.
Remember, post-processing is an art in itself, and it can take time to master. Don’t be afraid to experiment with different tools and techniques to find what works best for your images. With practice, you’ll be able to bring out the stunning details and colors in your astrophotography shots, creating images that truly capture the beauty of the cosmos.
Growing Your Skills: Navigating the Cosmos of Knowledge
Astrophotography, like any hobby, is a journey of continuous learning and improvement. As you grow more comfortable with the basics, there are always new techniques to learn, equipment to master, and challenges to overcome. Here are some tips and resources to help you continue growing your skills:
- Tips for Continuous Learning and Improvement:
- Experiment: Don’t be afraid to try new techniques, settings, or pieces of equipment. Every failure is an opportunity to learn.
- Practice: Astrophotography is a skill that improves with practice. The more time you spend under the stars, the better your images will become.
- Patience: Remember, astrophotography is a hobby that requires patience. Don’t be discouraged if you don’t get the perfect shot right away.
- Stay Curious: Keep up-to-date with the latest astrophotography trends and technologies. The field is always evolving, and there’s always something new to learn.
- Resources for Further Learning:
- Books: There are many great books on astrophotography that can provide in-depth knowledge and tips. Some popular choices include “The Backyard Astronomer’s Guide” by Terence Dickinson and Alan Dyer, and “Astrophotography” by Thierry Legault.
- Online Courses: Websites like Udemy, Coursera, and Lynda offer online courses on astrophotography, ranging from beginner to advanced levels.
- Communities: Joining astrophotography communities can be a great way to learn from others, get feedback on your images, and stay motivated. Check out online forums like Cloudy Nights, or social media groups dedicated to astrophotography.
Remember, the journey of astrophotography is one of lifelong learning. Embrace the journey, keep reaching for the stars, and watch as your skills continue to grow.
Embarking on Your Astrophotography Journey
As we reach the end of this guide, we hope that you’re feeling inspired and ready to embark on your own astrophotography journey. Remember, every great astrophotographer started as a beginner, looking up at the night sky with a sense of wonder and a desire to capture its beauty.
Astrophotography is a unique hobby that combines art, science, and a love for the cosmos. It offers a chance to explore the universe from your own backyard, capturing stunning images of celestial bodies and astronomical events. But perhaps more importantly, it offers a journey of continuous learning and discovery.
As you venture into astrophotography, remember that it’s not about getting the perfect shot right away. It’s about the thrill of seeing the night sky in a new way, the joy of capturing your first image of the stars, and the satisfaction of seeing your skills improve over time.
So, don’t wait for the stars to align perfectly. Start where you are, use what you have, and learn as you go. Embrace the journey, keep learning, and most importantly, enjoy every moment under the stars.
Clear skies and happy shooting!
